You have found the perfect Emerald Oval Cut Ring Sterling Silver Real Emerald—the stone is stunning, the setting is elegant, and your partner will absolutely love it. But before you click “buy,” there is one critical question: do you know their ring size? Getting the ring size right is one of the most common challenges in online jewelry shopping, and when it comes to emerald rings, precision matters more than ever. Our comprehensive emerald ring size guide will teach you everything you need to know about how to measure ring size accurately from the comfort of your home.
Why Emerald Rings Need Special Attention
Unlike diamond rings, which are often set in traditional solitaire or halo designs, emerald rings frequently feature large center stones in elaborate settings such as three-stone arrangements, vintage-inspired designs, or intricate pave bands. These designs often have less flexibility for Gold Natural Emerald Ring. Here is why:
Stone Security: Emerald stones are typically set in bezels, prongs, or channel settings that were carefully designed for a specific ring size. Major resizing can stress the setting and potentially compromise the stone’s security over time.
Proportional Design: Many Natural Emerald Cut Engagement Rings Gold are designed with specific band widths and shoulder designs that balance the proportions of the center stone. Altering the size significantly can disrupt this careful aesthetic balance.
Treatment Considerations: Many emeralds undergo standard treatments like oiling to enhance clarity. Extreme temperature changes during resizing (soldering and polishing) could potentially affect these treatments.
This is why getting the size right the first time is especially important for emerald rings. Our how to measure ring size guide will help you do exactly that.

At-Home Ring Size Measurement Methods

You do not need to visit a jeweler to determine ring size. With the right approach, you can achieve accurate results at home. Here are three reliable methods:
Method 1: The Printed Ring Sizer
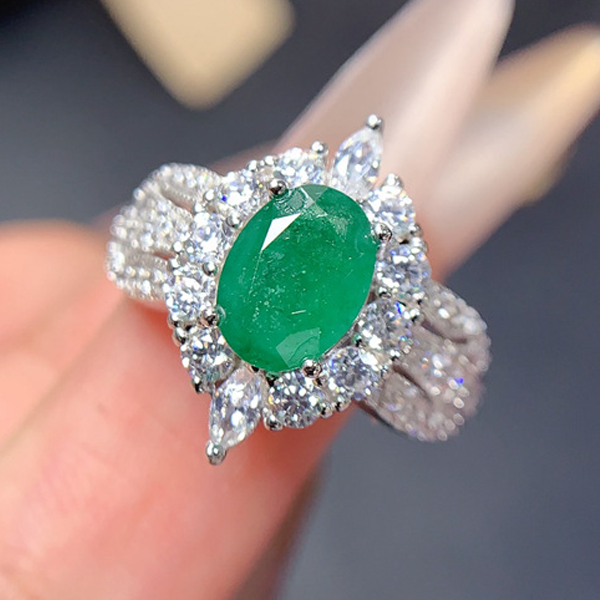
This is the most accurate at-home method. Follow these steps:
- Download a reputable ring sizer PDF (search “ring size chart printable PDF” from a jeweler’s website)
- Print it at 100% scale—do not use “fit to page” settings
- Check the printout by measuring the calibration bar with a ruler—it should read exactly 1 inch
- Cut along the dotted line and thread the pointed end through the slot
- Slip the sizer onto the target finger and pull until it fits snugly but comfortably
- Read the number at the slot—this is the ring size
Method 2: The String or Paper Strip Method
A simpler alternative when you cannot print:
- Cut a thin strip of paper or use a piece of non-stretchy string
- Wrap it around the base of the target finger (or an existing ring on that finger)
- Mark the point where the strip overlaps
- Measure the length in millimeters against a ruler
- Divide by 3.14 (pi) to get the diameter, then match to a ring size chart
Method 3: The Existing Ring Method
If you have access to a ring that already fits the intended wearer:
- Measure the inner diameter of the ring in millimeters
- Match the diameter to the corresponding US ring size
- For extra accuracy, measure at least three different points and take the average

Best Time to Measure Ring Size
Timing your measurement correctly is just as important as using the right technique. Here are the key principles:
- End of Day: Fingers are typically largest at the end of the day due to natural fluid retention. Measure in the late afternoon or early evening for the most accurate fit.
- Warm Weather: Heat causes fingers to swell. If measuring during a hot day, wait until your fingers are at normal temperature.
- Cold Weather: Cold causes fingers to shrink. Do not measure immediately after coming in from the cold.
- After Exercise: Avoid measuring after physical activity when fingers may be swollen.
- For the Correct Finger: If this is for an engagement ring, measure the ring finger on the left hand (traditional), unless there is a reason to use a different finger.
International Ring Size Conversion
The United States uses a numerical system (sizes 1-15 with half sizes), but many countries use different standards. Here is a quick reference for the most common systems:
| US / Canada | UK / Australia | Europe (mm) | Japan | Circumference (mm) |
|---|---|---|---|---|
| 5 | J 1/2 | 49.3 | 9 | 49.0 |
| 6 | L 1/2 | 51.9 | 12 | 51.9 |
| 7 | N 1/2 | 54.5 | 14 | 54.4 |
| 8 | P 1/2 | 57.0 | 16 | 57.0 |
| 9 | R 1/2 | 59.6 | 18 | 59.5 |
If you need a full conversion table, check out our comprehensive ring size guide page for all sizes.
When Between Two Sizes: The Emerald Ring Rule
Finger sizes fluctuate, and sometimes you fall right between two sizes. Here is the critical rule for Verlobungsringe mit Smaragd und Diamant: when in doubt, go with the larger size.
Here is why:
- It is easier to add sizing beads or adjust with a ring adjuster than to remove metal
- Fingers typically swell more easily than they shrink as people age or gain weight
- A ring that is slightly too large is far more comfortable to wear daily than one that is too tight
For Smaragd-Verlobungsringe specifically, minor resizing by a professional jeweler is possible (typically up to one size in either direction), but significant changes may require cutting the band—a process that is not ideal for intricate settings or rings with significant gemstone treatments. This is why precision in your initial measurement pays dividends.

Conclusion: Get It Right the First Time
Getting the right ring size is the single most important step in ensuring your Smaragd-Verlobungsring will be worn and cherished for a lifetime. Follow the methods in this emerald ring size guide, measure at the right time of day, and when in doubt, err on the side of a slightly larger size. Your partner will thank you—and so will your emerald.
 English
 French
 German
 Italian
 Spanish
 Arabic
 Japanese
 Portuguese
 Korean
 Dutch
Dutch